post
Floorboard Sand and Polish: A Practical Australian Guide

A professional floorboard sand and polish can completely change how an ageing timber floor looks and performs without replacing the boards. Scratches, worn coating, dull traffic lanes, old colour and minor surface marks can often be removed through careful sanding. Then, a suitable coating protects the exposed timber and brings out its natural grain.
For Australian homes, however, good floor restoration involves more than running a sanding machine across the boards. Timber species, moisture, previous coatings, board thickness, repairs, dust control and the intended use of the room all influence the result.
A practical observation from professional timber-floor restoration workflows is that preparation often matters as much as the final coating. A beautiful finish cannot hide loose boards, protruding nails, deep sanding marks or contamination underneath it.
This guide explains how floorboard sanding and polishing works, what Australian property owners should expect, how to compare finishes and what to check before committing to the job.

Table of Contents
- What is floorboard sand and polish?
- Why timber floors are sanded and polished
- When sanding and polishing is suitable
- When a floor may need repairs first
- The floorboard sand and polish process
- Why the sanding sequence matters
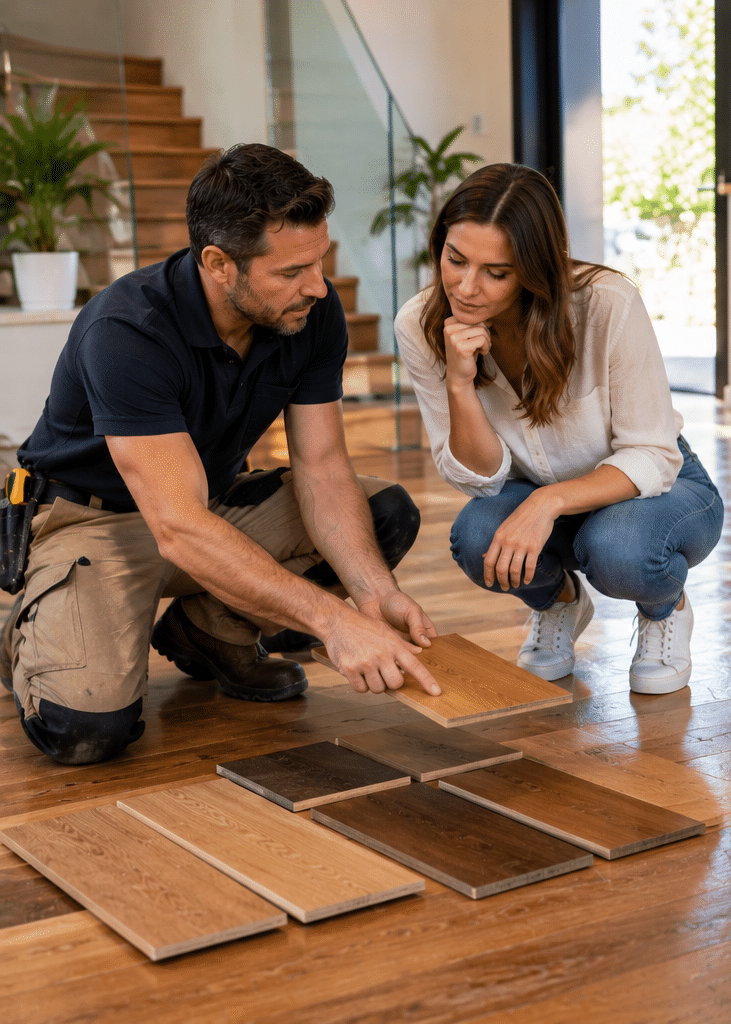
- Choosing a timber floor finish
- Matt, satin or gloss?
- Australian timber species and restoration
- Dust, coatings and renovation safety
- How much does floorboard sand and polish cost?
- How long does the work take?
- How to prepare your home
- DIY versus professional sanding
- Common floor sanding mistakes
- Caring for polished floorboards
- People Also Ask
- Floorboard sand and polish Q&A
- Conclusion
What Is Floorboard Sand and Polish?
Floorboard sand and polish is the process of mechanically sanding timber boards to remove worn coatings, scratches and minor surface unevenness, then applying a protective finish in the chosen sheen. In Australia, the exact sanding sequence and coating system should suit the timber species, floor condition, traffic level and indoor environment.
Why Floorboard Sand and Polish Can Transform Timber Floors
Timber flooring has an important advantage over many surface coverings: a worn surface does not always mean the entire floor has reached the end of its life.
Solid timber flooring, in particular, may be capable of being sanded and refinished several times, provided enough usable timber remains above the tongue or fixing system.
The Australian Timber Flooring Association, or ATFA, describes sanding and finishing as part of the normal construction and restoration process for many site-finished solid timber floors. It also notes that factors such as the environment, floor structure and required appearance need to be considered.
Australian homeowners can explore additional consumer guidance through the Australian Timber Flooring Association consumer information resources.
A floorboard sand and polish is therefore not simply cosmetic cleaning. Sanding physically removes a thin layer from the timber surface.
That can remove or reduce:
- old clear coatings;
- surface scratches;
- worn traffic areas;
- some stains;
- minor unevenness between boards;
- discolouration contained near the surface;
- coating contamination; and
- light dents or marks.
After sanding, the timber is effectively exposed again. Therefore, a compatible sealer, coating or finishing system is applied to protect it.
The word “polish” can be slightly misleading. In everyday Australian flooring language, people often use “sand and polish” to describe sanding followed by sealing and coating. The finish may actually be matt or satin rather than highly glossy.
When Is Floorboard Sand and Polish Worth Doing?
A floorboard sand and polish is generally worth investigating when the underlying timber remains structurally sound but the visible surface has deteriorated.
Typical signs include dull areas through hallways, scratched living-room floors, damaged coating near doors and faded sections exposed to heavy sunlight.
You may also notice that the timber looks permanently dirty even after cleaning. Sometimes this happens because the protective coating itself has become scratched and cloudy.
Good candidates for sanding
A floor may be a strong candidate when:
- the boards remain firmly installed;
- there is enough sanding allowance left;
- scratches are mainly surface-level;
- the old coating has worn unevenly;
- stains have not penetrated too deeply;
- minor repairs can be completed before sanding; and
- you want to change the colour or sheen.
However, inspection comes first.
The sanding allowance is particularly important on floors that have already been refinished several times. Excessive sanding can reduce the timber above the tongue-and-groove joint or expose fixings.
ATFA includes sanding allowance among the technical issues flooring professionals need to assess when working with existing timber floors.
When Sanding Alone Will Not Fix the Floor
Not every problem disappears when the sanding machine starts.
For example, deep water damage may affect far more than the coating. Likewise, severe cupping, loose boards, movement, termite damage or structural deterioration require investigation.
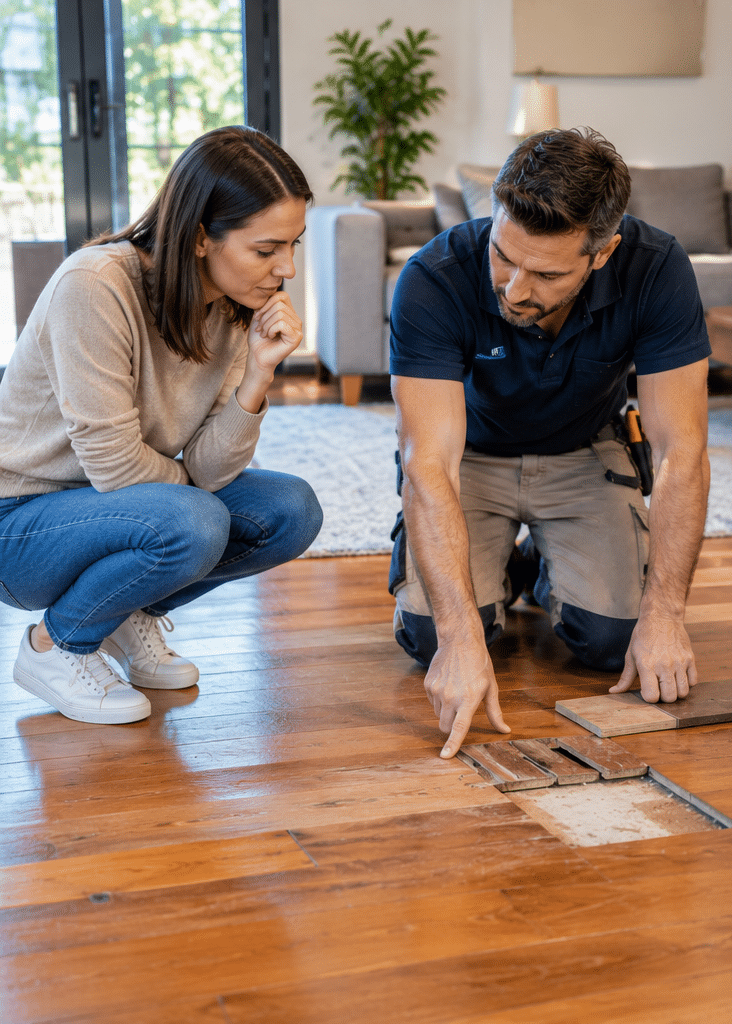
A contractor may recommend repairs before proceeding with a floorboard sand and polish.
Common issues include:
Loose or moving boards
Boards need to be reasonably stable. Otherwise, movement can continue after the new coating is applied.
Protruding nails
Nail heads can damage sanding equipment and create visible defects. Therefore, suitable fixings normally need to be checked and reset before sanding.
Large gaps
Seasonal gaps can occur naturally because timber responds to changes in moisture.
However, not every gap should automatically be filled. Timber needs to move, and inappropriate rigid filling can sometimes create other problems.
Deep stains
Pet urine, water, oils or other liquids can penetrate below the amount of timber that can safely be removed.
Consequently, sanding may lighten a stain without completely eliminating it.
Severely cupped boards
Cupping means the edges and centre of a board are no longer level.
Before aggressively sanding a cupped floor flat, the cause of the moisture movement needs to be understood. Otherwise, further movement may occur later.
Insufficient sanding allowance
Older tongue-and-groove boards may already have been sanded several times.
Therefore, the available timber thickness should be assessed rather than assuming another aggressive restoration is safe.
The Floorboard Sand and Polish Process Step by Step
A professional floorboard sand and polish normally follows a sequence rather than one sanding pass followed by one coat.
The exact method varies according to the floor. However, the overall workflow commonly looks like this.
1. Inspect the existing floor
The first stage is understanding what is actually being restored.
A flooring specialist may assess:
- timber type;
- board condition;
- existing finish;
- previous sanding;
- nail or fixing positions;
- gaps;
- stains;
- movement;
- moisture-related damage;
- repairs; and
- access around the property.
This stage matters because sanding cannot reverse every form of damage.
2. Remove furniture and prepare the area
Furniture, loose furnishings and other obstacles need to be moved from the working area.
Next, adjoining surfaces and sensitive spaces can be protected as appropriate.
Good preparation also gives sanding equipment clear access to the floor.
3. Complete required repairs
Loose boards, exposed fixings and damaged timber should be addressed where required.
In addition, an experienced contractor may discuss whether gaps should remain, be repaired or receive another treatment.
4. Begin the initial sanding cut
The first machine pass is normally designed to remove the old finish and flatten surface irregularities.
A coarser abrasive may be required when a floor has substantial coating or damage.
However, “coarser” does not mean “as aggressive as possible”.
Every sanding pass removes timber. Therefore, the aim is to use an appropriate sequence that corrects the surface without unnecessarily shortening the floor’s serviceable life.
5. Refine the sanding scratches
After the initial cut, progressively finer abrasives remove scratches left by the previous sanding stage.
ATFA technical material notes that sanding approaches should suit the condition of the floor. Its published industry material also discusses progressive abrasives and the importance of avoiding unnecessarily aggressive sanding, particularly on valuable or older floors.
6. Sand edges and detailed areas
Large floor sanders cannot reach every corner.
Therefore, specialised edging and detail equipment is used around walls, doorways, corners and similar areas.
The objective is to make these areas visually blend with the main floor.
7. Perform final surface preparation
Once sanding is complete, dust and debris must be removed carefully.
This is critical because fine material trapped under a clear coating can affect the final appearance.
8. Apply stain if required
Staining is optional.
Some owners want the timber’s natural colour. Others may prefer a warmer, darker, lighter or more contemporary tone.
However, a test area is valuable because different species absorb stain differently.
9. Apply the finishing system
The protective coating is then applied according to the selected product system.
Depending on the product, this may involve a sealer plus finish coats or multiple coats of another compatible system.
Application rates, recoating windows, ventilation requirements and cure periods should follow the coating manufacturer’s technical instructions.
10. Allow the floor to dry and cure
Drying and curing are not exactly the same thing.
A coating can become dry enough for limited foot traffic before it has reached full chemical or mechanical cure.
Therefore, always follow the contractor and product manufacturer’s instructions about walking on the floor, replacing furniture, placing rugs and returning to normal use.
Why the Floorboard Sand and Polish Sanding Sequence Matters
The sanding sequence is one of the most important parts of the job.
Imagine using very coarse sandpaper on furniture and then applying a clear finish immediately. Deep scratches would remain visible.
A floor behaves in much the same way.
Each sanding stage is intended to correct the marks left by the previous stage until the surface is sufficiently uniform for coating.
Depending on the floor, a sequence might move from relatively coarse to medium and then finer abrasives.
However, there is no universal grit sequence that should blindly be applied to every floorboard sand and polish project.
The starting point can change depending on:
- hardness of the timber;
- thickness of old coating;
- floor flatness;
- previous sanding;
- depth of scratches;
- staining;
- adhesive residue; and
- the selected finish.
That is why assessment is more important than copying a generic DIY sanding sequence.
Choosing the Best Finish After Floorboard Sand and Polish
The coating does two jobs.
First, it influences appearance. Second, and more importantly, it becomes the wear layer protecting the timber underneath.
Several finishing technologies are used in Australia.
| Finish type | Typical appearance | Main advantages | Points to consider |
| Water-based polyurethane | Clear, available in several sheen levels | Fast drying, generally lower odour and lower solvent content than many traditional solvent systems | Product quality and application method matter; follow manufacturer cure instructions |
| Solvent-based polyurethane | Often warmer or richer in appearance | Durable coating systems are available | Stronger odour and higher solvent exposure can be concerns; ventilation and product safety instructions matter |
| Oil or modified-oil finish | Natural, warm appearance | Can emphasise timber character | Maintenance requirements differ by product |
| Hardwax-style oil | Natural, low-build appearance | Some systems allow localised maintenance | May require more frequent or specialised maintenance than film-forming coatings |
This table is a general comparison rather than a product specification.
Coating chemistry varies significantly. Therefore, compare the technical data sheets for the actual products proposed for your floor.
Workplace Health and Safety Queensland recommends eliminating or substituting hazardous chemicals where reasonably practicable and gives lower-VOC or water-based coatings as examples of ways chemical exposure may be reduced in coating work.
Matt, Satin or Gloss Floorboards?
Once the coating type has been chosen, you may also need to choose sheen.
There is no universally “best” option.
Matt
Matt finishes reflect less light.
As a result, they can suit natural, contemporary and understated interiors. They can also make minor surface marks less visually obvious than a very high-gloss floor.
Satin
Satin sits between matt and gloss.
Therefore, it is a popular middle ground for homeowners who want noticeable timber depth without strong reflections.
Gloss
Gloss reflects the most light and can create a more formal or polished appearance.
However, reflected light may also make dust, small scratches and surface imperfections easier to notice.
In practice, choose sheen based on the room, timber, lighting and maintenance expectations rather than assuming more shine means better protection.
Floorboard Sand and Polish for Australian Timber Species
Australia has a wide variety of timber flooring, including both native hardwoods and imported species.
You may encounter:
- Blackbutt;
- Spotted Gum;
- Tasmanian Oak;
- Brushbox;
- Australian hardwood mixtures;
- Cypress Pine;
- Jarrah;
- Victorian Ash; and
- various oak flooring products.
Different species vary in hardness, grain, colour and response to finishing.
Consequently, a floorboard sand and polish should not treat every floor as identical.
Blackbutt
Blackbutt is often valued for its relatively light, warm colouring and visible natural variation.
A clear finish can preserve that character. Meanwhile, staining can alter it significantly, so testing is sensible.
Spotted Gum
Spotted Gum can display strong natural colour variation and prominent grain.
Therefore, a clear or lightly coloured finish may be chosen when the aim is to retain those natural differences.
Tasmanian Oak and Victorian Ash
These names commonly refer to groups of related Australian hardwoods.
Their lighter appearance gives owners considerable flexibility when selecting stains and interior colours.
Cypress Pine
Older Australian homes sometimes contain Cypress Pine floors.
Because softer areas and harder knots can react differently during sanding, operator control becomes important.
Floorboard Sand and Polish in Queensland and Other Humid Areas
Timber is hygroscopic. In simple terms, it exchanges moisture with the surrounding environment.
Therefore, boards can expand or contract as conditions change.
ATFA’s consumer information notes that natural expansion and shrinkage should be expected in timber floors.
That matters in Australian climates where seasonal conditions differ substantially.
A home in humid coastal Queensland may experience different conditions from one in inland New South Wales or southern Victoria.
Therefore, visible gaps or slight movement should not automatically be treated as a sanding defect.
More importantly, active moisture problems should be investigated before refinishing.
There is little benefit in creating a perfectly finished surface while an unresolved leak, damp subfloor or other moisture source continues affecting the boards.
Dust Control and Floor Sanding Safety
Sanding produces fine airborne material.
Therefore, dust control is not merely about keeping the house tidy.
Workplace Health and Safety Queensland states that airborne dust can be hazardous and specifically identifies sanding as an activity capable of producing dust.
For more detail, see the Queensland Government’s guidance on hazardous dust and workplace exposure controls.
Professional equipment commonly combines sanding machinery with extraction systems designed to capture much of the dust near its source.
However, no sensible contractor should describe every real-world sanding job as literally producing zero dust.
Instead, homeowners should ask:
- What dust extraction system will be used?
- How are edges and corners controlled?
- Will adjoining rooms be isolated?
- What cleaning is included?
- What personal protective equipment is required?
- How will sanding waste be managed?
Those questions reveal far more than a simple “dust-free” marketing claim.
Extra Safety Checks in Older Australian Homes
Older buildings deserve additional caution before any renovation begins.
This is particularly important when sanding may disturb unknown building materials.
Workplace Health and Safety Queensland advises that properties built or renovated before 1990 may contain asbestos-containing products. It also warns that sanding or otherwise disturbing asbestos-containing material can release hazardous fibres.
That does not mean timber floorboards themselves should automatically be assumed to contain asbestos.
Instead, the concern may involve surrounding or underlying building materials, old flooring products, backing materials or other parts of the renovation area.
If suspicious material is present, stop before disturbing it and obtain appropriate professional advice.
Queensland property owners can review the state’s official asbestos renovation safety information.
Similarly, old surface coatings can sometimes require additional investigation. Therefore, a professional assessment is particularly valuable when the existing finish or renovation history is unknown.
Any compliance checks mentioned here are practical safety and administrative considerations, not legal advice.
How Much Does Floorboard Sand and Polish Cost in Australia?
There is no reliable single national price for a floorboard sand and polish.
Quotes vary because contractors are not simply pricing square metres. They are pricing the condition of those square metres.
For example, two 50 m² floors can require very different amounts of work.
One may be a clear rectangular room with sound boards and a straightforward coating system. Another may include stairs, deep scratches, old coatings, multiple repairs, detailed edges and restricted access.
Important cost factors include:
- total floor area;
- existing coating;
- floor condition;
- amount of repair work;
- number of rooms;
- stairs;
- edges and detailed areas;
- timber hardness;
- stain application;
- chosen coating system;
- number of coats;
- furniture removal;
- site access;
- commercial versus residential use; and
- location.
Therefore, online per-square-metre figures should only be treated as estimates.
A better quote explains what is included.
For example, check whether the price covers repairs, nail punching, sanding stages, dust control, staining, coating type, number of coats and final clean-up.
A low headline rate can become poor value if important preparation work is excluded.
How Long Does Floorboard Sand and Polish Take?
The timeframe depends on both the sanding work and the coating system.
A small, straightforward area will normally take less time than an entire house containing repairs, stairs and multiple rooms.
In addition, coating conditions matter.
Temperature, humidity, ventilation, coat thickness and product chemistry can all affect drying or recoating.
Therefore, avoid relying on a generic promise such as “your floor will be ready tomorrow”.
Instead, ask for separate guidance on:
- when sanding begins;
- when coating will be completed;
- when light foot traffic is permitted;
- when furniture can return;
- when rugs can be placed; and
- when the coating reaches its intended cure.
This creates a much more realistic plan.
Numbered Checklist: Preparing for Floorboard Sand and Polish
Before your contractor arrives, use this checklist.
- Confirm the exact rooms being restored. Clearly mark where the sanding and coating area begins and ends.
- Remove furniture and loose items. Unless furniture removal is included in the quote, clear the working area in advance.
- Discuss appliances and heavy fixtures. Do not assume large kitchen appliances, built-in units or heavy furniture can simply be moved.
- Remove fragile objects nearby. Even with good dust extraction, renovation work involves vibration and movement.
- Arrange access. Make sure contractors can safely bring sanding machines and extraction equipment into the property.
- Plan around the coating schedule. Confirm when family members, children and pets should stay away from the work area.
- Ask about old or suspicious materials. This is especially important in older properties or where previous floor coverings have recently been removed.
- Choose the finish in advance. Decide whether you prefer a natural floor, stain, matt, satin or gloss appearance.
- Ask for a sample if colour is important. Timber species, age and sanding can change the way stains appear.
- Confirm after-care instructions. Before work begins, understand when you can walk on the floor, move furniture back and resume normal cleaning.
DIY Floorboard Sand and Polish vs Professional Work
Hiring a floor sander looks simple.
Using one evenly across an entire room is not.
A sanding machine removes timber quickly. Consequently, stopping too long, lowering the drum incorrectly or changing direction poorly can create deep marks.
| Consideration | DIY approach | Professional approach |
| Equipment | Usually hired for a limited period | Specialised sanding, edging and extraction equipment |
| Surface assessment | Depends on homeowner experience | Condition assessed before selecting sanding sequence |
| Risk of sanding marks | Higher for inexperienced operators | Reduced through technique and equipment control |
| Dust management | Depends on hired equipment | Dedicated extraction methods can be planned |
| Repairs | May require separate skills | Can often be integrated into the restoration plan |
| Coating selection | Homeowner researches products | System selected for floor and expected use |
| Responsibility for mistakes | Homeowner | Contractor subject to agreed scope and terms |
DIY can make sense for an experienced renovator working on a suitable floor.
However, professional help becomes more attractive when the floor is valuable, thin, previously sanded, heavily damaged, stained or part of an older property.
A mistake that requires another full sanding pass removes additional timber. Therefore, saving on labour can become expensive if the surface has to be corrected.
Common Floorboard Sand and Polish Mistakes
Starting too aggressively
Coarse sanding removes material quickly.
However, using unnecessarily aggressive abrasives can shorten the usable life of the boards.
Skipping abrasive stages
Each sanding stage should remove marks from the previous one.
Therefore, jumping from very coarse to very fine paper can leave scratches that become obvious after coating.
Ignoring edges
A beautiful centre section will still look poor if the edges have a different texture or sanding pattern.
Failing to fix nail heads
Exposed metal can damage abrasives and equipment.
Applying coating over contamination
Oil, cleaning residues, silicone and other contaminants may interfere with coating adhesion or appearance.
Choosing colour from a screen
Digital examples are useful for inspiration.
However, your actual timber species, age and lighting affect the final appearance.
Moving furniture back too soon
“Dry” does not necessarily mean “fully cured”.
Heavy furniture, rugs or protective covers placed too soon can interfere with the coating.
Using too much water afterwards
Timber floors generally benefit from controlled cleaning rather than soaking.
Standing water can enter gaps and affect timber movement.
How to Maintain Floorboards After Sanding and Polishing
A successful floorboard sand and polish should be followed by sensible maintenance.
Otherwise, a new coating can wear prematurely.
Control grit at entrances
Small particles carried indoors on shoes behave like abrasives.
Therefore, quality entrance mats can reduce scratching.
Fit furniture protection
Use suitable felt or protective pads underneath furniture that moves.
Check them periodically because grit can become embedded in the pads.
Clean spills promptly
Timber and prolonged moisture are not a good combination.
Therefore, wipe spills promptly rather than allowing water or other liquids to sit on the coating.
Follow the coating manufacturer’s cleaning instructions
Avoid assuming that any household cleaner is safe.
Some products can leave residue, dull the finish or affect future recoating.
Avoid over-wetting the floor
A damp cleaning method is usually preferable to flooding the surface.
Recoat before the timber is exposed
One of the smartest maintenance strategies is acting before traffic completely wears through the protective coating.
A maintenance recoat may be less invasive than waiting until bare timber is exposed and another complete floorboard sand and polish becomes necessary.
How to Choose a Floor Sanding Contractor in Australia
Price matters, but it should not be the only comparison point.
Ask prospective contractors practical questions.
For example:
- How will you assess the remaining sanding allowance?
- What sanding equipment will you use?
- How is dust controlled?
- What coating system do you recommend, and why?
- How many coats are included?
- Will repairs be priced separately?
- How will stairs and edges be handled?
- What sheen options are available?
- What drying and curing instructions will I receive?
- What maintenance is required afterwards?
- What does the written quote exclude?
A contractor who can explain the reasoning behind the process is easier to evaluate than one who simply promises a “perfect” result.
Perfection is also the wrong standard for a natural timber floor.
Wood contains natural colour differences, grain variation, knots and movement. An older floor may also retain character from its history.
Therefore, the aim is a professionally restored timber floor, not a piece of printed plastic with zero variation.
For homeowners and property managers in South-East Queensland looking for professional assessment and restoration options, see Enviro Floors timber floor sanding and polishing services.
People Also Ask About Floorboard Sand and Polish
How many times can floorboards be sanded and polished?
There is no fixed number that applies to every timber floor. The remaining timber above the tongue, previous sanding history, board thickness and damage all matter, so the floor should be assessed before another floorboard sand and polish is started.
Does sanding remove all scratches from timber floors?
Surface scratches will often disappear during sanding. However, very deep gouges can extend further into the timber than it is sensible to sand, so repair or partial replacement may sometimes be preferable.
Can I stay in my house while floorboards are being sanded?
Sometimes parts of a home can remain usable, but it depends on access, dust isolation and the selected coating. Discuss the work zones, ventilation, drying period, pets and children with your contractor before the project begins.
Is satin or matt better for polished floorboards?
Neither is automatically better. Matt provides a softer, lower-reflection appearance, while satin offers slightly more sheen; the choice should be based on your interior, lighting and preferred appearance rather than assuming sheen determines overall coating quality.
Do floorboards need to be stained after sanding?
No. Staining is optional. Many homeowners choose a clear finishing system because they want the natural colour and grain of the timber to remain visible.
Floorboard Sand and Polish: Expert Q&A
1. Can a timber floor be recoated instead of fully sanded?
Sometimes.
If the existing finish remains sound and the timber itself is not deeply scratched, stained or exposed, a maintenance recoat may be possible.
However, compatibility matters. The old coating needs to be assessed, cleaned and prepared correctly so the new coat can adhere.
Therefore, recoating should not simply mean applying another layer over an unprepared floor.
2. Should gaps between floorboards always be filled during restoration?
No.
Some gaps occur because timber expands and contracts naturally. Filling every moving joint with rigid material can create problems if the boards continue moving.
The contractor should identify whether a gap is normal seasonal movement, damage or a repair issue before selecting a treatment.
3. Can floorboard sanding change the colour of old timber?
Yes.
Removing an aged coating can expose fresher timber beneath it. In addition, some old coatings yellow or darken over time.
Consequently, the newly sanded floor may look noticeably different even before stain or clear finish is applied.
The final coating can also influence perceived warmth and colour.
4. What should be included in a good floor sanding quote?
A useful quote should describe more than the total dollar amount.
Ideally, it identifies the floor area, preparation, repairs or exclusions, sanding scope, coating system, number of coats, stain if applicable, expected schedule and relevant after-care instructions.
That makes competing quotes easier to compare on actual scope rather than price alone.
5. How do I know when polished floorboards need maintenance?
Look for changes in the protective finish rather than waiting for severe timber damage.
High-traffic areas may become dull first. Fine scratches can increase, and the sheen may become uneven.
If the coating is wearing but still intact, ask whether maintenance recoating is appropriate. Acting early may reduce the need for another full floorboard sand and polish.
Final Thoughts: Restoring Timber Rather Than Replacing It
A quality floorboard sand and polish can give an existing timber floor a new serviceable surface while preserving the boards already in the building.
However, the best results start long before the final coat.
First, determine whether the timber is suitable for another sanding. Next, address repairs and moisture concerns. Then, use an appropriate progressive sanding process, control dust carefully and select a coating system that matches the room’s use.
Just as importantly, think about future maintenance.
A floor does not need to remain untouched until the coating fails completely. Regular cleaning, furniture protection and timely maintenance can help preserve the finish and reduce how often major restoration is required.
For Australian homeowners, that makes floor sanding less about creating a temporary shine and more about managing a natural building material over the long term.
When the boards are sound, professional restoration can reveal timber that has been hidden beneath years of wear, scratched coatings and discolouration. The goal should not be an exaggerated promise of a flawless floor. Instead, it should be a carefully prepared, attractive and durable finish that respects the timber already in your home.