post
Best Floor Sanding Supplies Near Me in Australia: A Practical Timber Floor Guide

If you are searching for floor sanding supplies near me, you are probably deciding whether to restore a timber floor yourself, hire sanding equipment, buy abrasives and coatings, or bring in a professional. In Australia, getting a good result involves much more than finding the nearest packet of sandpaper. The condition of the timber, sanding sequence, machinery, dust extraction, repairs, coating compatibility and application method all affect the finished floor. This guide takes a practical timber-floor restoration approach so homeowners, renovators and property managers can understand what supplies they actually need before starting.
What Are Floor Sanding Supplies Near Me?
Floor sanding supplies near me refers to the local products, tools and hire equipment needed to prepare, sand, edge, clean and refinish a timber floor. In Australia, a complete setup usually includes graded abrasives, sanding machines, dust extraction, PPE, repair materials, coatings and suitable application tools.

Table of Contents
- What floor sanding supplies do you actually need?
- Understanding the Australian timber floor sanding process
- Sanding machines and equipment
- Choosing sandpaper and abrasive grits
- Dust extraction and personal protection
- Timber repair and preparation supplies
- Floor finishes and coatings
- DIY, equipment hire or professional sanding?
- How to find floor sanding supplies near you
- Floor sanding supply checklist
- Common buying mistakes
- Australian timber species and sanding
- People Also Ask
- Expert Q&A
- Conclusion
What Floor Sanding Supplies Near Me Should Include
Searching for floor sanding supplies near me can produce everything from general hardware shops to specialist flooring suppliers and equipment-hire businesses. However, buying whatever appears first is not necessarily the best approach.
The correct supplies depend on four things:
- your timber species;
- the condition of the existing floor;
- the coating already on the boards; and
- the finish you want to apply afterwards.
For example, a relatively flat timber floor with a worn clear finish may require a very different sanding sequence from a floor covered with thick paint, old adhesive, heavy cupping or deep scratches.
Therefore, inspect the floor before purchasing abrasives.
The Australian Timber Flooring Association recommends assessing the condition of a floor before sanding. It also identifies preparation measures such as cleaning, dust minimisation and protection before the sanding stage begins.
For further technical information, homeowners and flooring professionals can refer to the Australian Timber Flooring Association sanding and coating resources.
Essential floor sanding supplies
For a typical timber floor restoration, the supply list may include:
- belt or drum floor sander;
- floor edger;
- detail or orbital sander;
- sanding belts, discs or sheets in several grits;
- industrial dust extractor or suitable vacuum;
- dust bags and replacement filters;
- hearing protection;
- eye protection;
- appropriate respiratory protection;
- knee protection;
- hammer and nail punch;
- timber repair products;
- floor filler where suitable;
- vacuum and cleaning equipment;
- applicators or rollers;
- selected floor coating;
- inter-coat abrasives or screens;
- clean containers and mixing tools where required.
Not every project requires every item.
In fact, knowing what not to buy can save as much money as finding a low-cost supplier.
Why the Sanding Process Matters Before Buying Supplies
When people search for floor sanding supplies near me, they often start with sandpaper.
However, grit selection should come after an inspection.
The purpose of floor sanding is not simply to make boards feel smooth. Instead, sanding should produce a sufficiently flat, consistent surface that can accept the chosen finishing system.
Australian Timber Flooring Association specifications state that sanding should create a flat surface suitable for the specified coating system.
That distinction matters.
A surface may feel smooth to your hand while still containing:
- drum marks;
- scratches from the previous abrasive;
- edger marks;
- uneven colour;
- coating residue;
- dish-out around soft grain;
- damaged board edges; or
- areas that have been sanded more heavily than others.
Once a clear finish is applied, many of these problems become more noticeable rather than disappearing.
Therefore, supplies should be chosen as part of a complete sanding sequence.
Floor Sanding Machines and Supplies Near Me
For a full timber floor, hand sanding is generally unrealistic.
Most complete restoration projects require at least a main sanding machine and an edging machine.
Belt or drum floor sander
A professional-style belt or drum sander handles the main open sections of the floor.
Its job is to remove old finish, flatten the boards and progress the surface through increasingly fine abrasive grades.
However, these machines remove material quickly.
Holding one machine in the same position for too long can create a depression in the floor. Starting, stopping or turning incorrectly may also create sanding marks.
Therefore, beginners should read the machine-hire company’s operating instructions and practise safe starting and stopping techniques before sanding a visible area.
Floor edger
A large sanding machine cannot reach close enough to walls and skirting boards.
Consequently, an edging sander is normally required.
Edgers are powerful machines rather than oversized household orbital sanders. They can remove material rapidly, particularly when coarse discs are fitted.
Matching the scratch pattern produced by the edger with the central floor is an important part of achieving a uniform finish.
Detail sander
Corners, door frames, stairs and other tight spaces can require smaller tools.
Depending on the project, these may include:
- triangular detail sanders;
- random orbital sanders;
- hand scrapers; or
- hand sanding blocks.
A detail sander is useful, but it should not be treated as a replacement for a proper floor sander over large rooms.
Choosing Abrasives When Searching for Floor Sanding Supplies Near Me
Abrasives are among the most important floor sanding supplies.
Sandpaper is graded by grit number. Lower numbers are coarser and remove material more aggressively. Higher numbers create a finer scratch pattern.
A common mistake is assuming that using the finest available abrasive from the beginning will produce the smoothest floor.
Usually, it will simply work very slowly.
Conversely, starting with an unnecessarily aggressive abrasive can remove more timber than needed.
A practical abrasive sequence
The exact sequence varies according to the timber and condition of the floor.
For example, a contractor dealing with an old, uneven coating might move through a progression such as:
40 grit → 60 grit → 80 grit → 100 grit
However, this is an example rather than a universal specification.
A floor that only requires light preparation may start finer. Meanwhile, heavily damaged surfaces may require a more aggressive initial cut.
The key principle is gradual scratch refinement.
Each abrasive stage should remove the sanding scratches left by the previous stage.
Skipping too far between grades can leave scratches that only become obvious when stain or clear coating is applied.
Why buying extra abrasives helps
Abrasive performance reduces as the cutting surface loads with coating residue, timber dust or resin.
Therefore, buying only one belt or disc for each grit can be false economy.
A dull abrasive:
- removes material more slowly;
- encourages additional machine passes;
- may generate more heat;
- can produce inconsistent results.
When estimating quantities, consider the floor area, existing coating and timber hardness rather than simply the number of rooms.
Abrasive Selection for Different Floor Conditions
| Floor condition | Likely approach | Key concern |
| Light surface wear | Finer starting abrasive may be possible | Avoid removing unnecessary timber |
| Worn clear finish | Progressive sanding sequence | Remove coating evenly |
| Deep scratches | More aggressive initial cut may be needed | Do not oversand surrounding boards |
| Uneven boards | Professional assessment is advisable | Excessive sanding can shorten floor life |
| Old paint or thick coating | Test removal method first | Coating may quickly clog abrasives |
| Parquetry | Direction and machine technique become critical | Pattern changes timber grain direction |
| Older thin flooring | Determine remaining sanding allowance | Another full sanding may not be appropriate |
The table is deliberately general.
A professional inspection is more reliable than choosing abrasive grades from a photograph.
Floor Sanding Dust Extraction Supplies Are Essential
Dust management should be considered before the sander is switched on.
Sanding timber creates airborne wood dust as well as larger particles.
Australian workplace guidance treats wood dust seriously. WorkSafe Victoria explains that sanding can generate airborne wood dust and recommends engineering controls such as local exhaust ventilation. For portable equipment, it specifically discusses on-tool extraction connected to a suitable dust collector.
You can read the full WorkSafe Victoria guidance on wood dust and dust controls.
Therefore, when comparing floor sanding supplies near me, check the extraction system as carefully as the sanding machine.
Useful dust-control equipment
Consider:
- sanders with integrated dust collection;
- securely connected extraction hoses;
- industrial dust extractors suitable for the task;
- appropriate filtration;
- replacement dust bags;
- door and opening protection;
- vacuum equipment for final cleaning.
Avoid assuming that an ordinary domestic vacuum is suitable for collecting large quantities of fine sanding dust.
In addition, dust extraction should not be treated as permission to ignore respiratory protection.
Engineering controls and PPE perform different functions.
Wood dust and respiratory protection
Safe Work Australia currently identifies wood dust, including certain hardwood and softwood dust, as a respiratory sensitiser in its workplace exposure guidance.
The relevant current information is available through Safe Work Australia’s airborne contaminant guidance.
For workplace sanding, businesses should follow the WHS or OHS requirements that apply in their state or territory, together with relevant safety data sheets and equipment instructions.
This article provides practical information rather than workplace health and safety or legal advice.
PPE to Add to Your Floor Sanding Supplies List
Even a small residential floor can create substantial dust and noise.
Therefore, suitable PPE may include:
- properly selected respiratory protection;
- safety glasses or goggles;
- hearing protection;
- suitable footwear;
- knee protection; and
- clothing that limits unnecessary skin exposure to dust.
WorkSafe Victoria notes that respiratory protection may be needed where higher-order dust controls do not adequately control exposure. It also discusses P2 filtration as one common option depending on the exposure and equipment involved.
Importantly, buying a respirator is not enough by itself.
Correct fit, filter selection, maintenance and use matter too.
Timber Repair Supplies Before Sanding
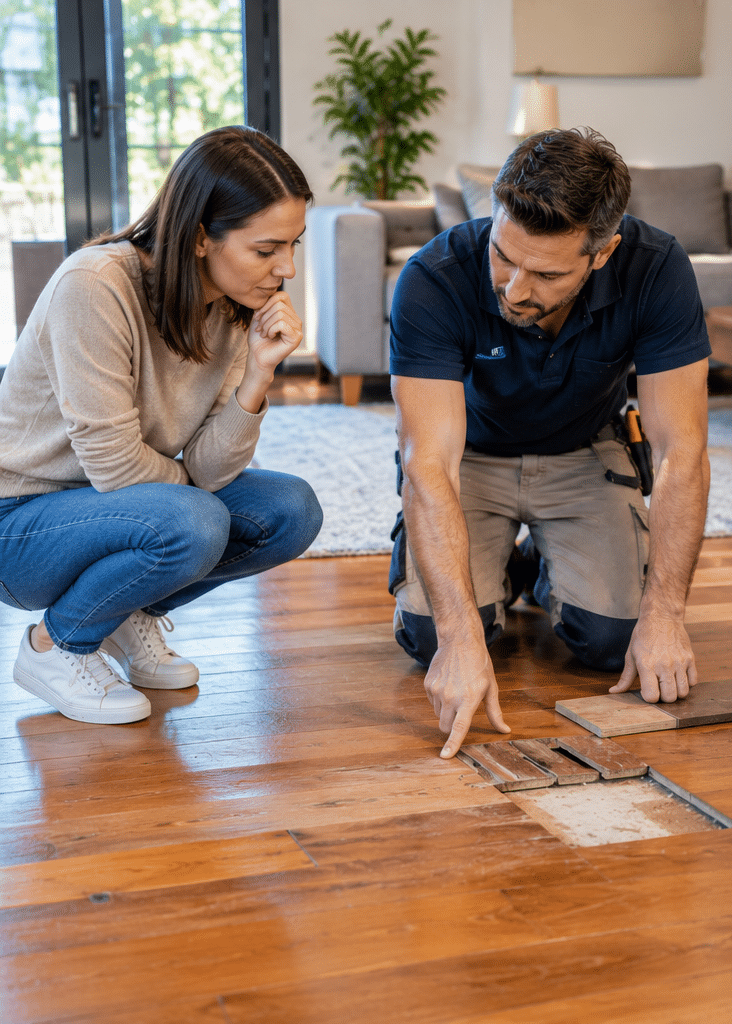
Before sanding begins, inspect the floor for physical defects.
These can include:
- protruding nails;
- loose boards;
- squeaks;
- split boards;
- damaged tongues;
- large gaps;
- water damage;
- old repairs;
- adhesive contamination.
Running a sanding machine across exposed nails can damage the abrasive and machine.
Therefore, protruding fixings usually need to be dealt with before sanding.
Nail punches and hand tools
A nail punch is inexpensive but important for older face-nailed floors.
Other useful preparation tools can include:
- hammer;
- pry bar;
- scraper;
- pliers;
- utility knife;
- measuring tools.
However, loose or structurally damaged flooring may need repair rather than simply filler.
Floor filler
Floor filler can improve some small imperfections.
Nevertheless, it should not automatically be placed into every visible gap.
Timber naturally responds to environmental conditions, and gaps can change throughout the year.
Furthermore, inappropriate filling of moving joints can lead to cracking or unattractive failure.
For larger gaps, damaged boards or heritage flooring, obtain professional advice before filling extensively.
Why Moisture Matters Before Sanding
Moisture is another reason that searching for floor sanding supplies near me should begin with inspection rather than purchasing.
A timber floor can change dimension as its moisture content changes.
Consequently, sanding a floor while it is abnormally cupped, swollen or affected by moisture may remove too much material from the wrong places.
ATFA guidance specifically notes that pre-sanding assessment may include moisture assessment.
Therefore, investigate the cause of unusual movement before attempting to sand it flat.
For example, moisture may come from:
- leaks;
- inadequate subfloor ventilation;
- wet building work;
- plumbing problems;
- exterior water entry;
- changing environmental conditions.
Sanding does not repair the source of a moisture problem.
Floor Coating Supplies Near Me: Choose the Finish Before Final Sanding
The coating system influences how the floor should be prepared.
Therefore, do not leave coating selection until after sanding is complete.
Common timber floor finishing categories include:
- water-based polyurethane systems;
- solvent-based finishes;
- oils;
- hardwax oils;
- stains combined with compatible coating systems.
Each product has its own preparation requirements.
Always read the manufacturer’s technical data before application.
Why compatibility matters
Mixing unrelated products can create problems.
For example:
- a stain may not be compatible with the topcoat;
- contamination may reduce coating adhesion;
- incorrect inter-coat sanding may affect bonding;
- application outside recommended conditions can affect curing.
In practice, using one tested coating system is generally easier than assembling unrelated products because each happens to be available nearby.
Matt, satin or gloss?
Sheen affects appearance rather than simply durability.
A matt finish tends to reflect less light and can give timber a softer appearance.
Satin provides moderate reflection.
Gloss creates a stronger reflective appearance and can make surface irregularities more visible under certain lighting conditions.
Therefore, choose sheen according to the desired appearance, room lighting and maintenance expectations.
DIY Supplies vs Equipment Hire vs Professional Floor Sanding
Searching for floor sanding supplies near me often means you are still deciding between DIY work and professional restoration.
The following comparison can help.
| Option | Best suited to | Main advantages | Main limitations |
| Buy sanding tools | Frequent small projects | Tools remain available | Professional floor machinery is expensive |
| Hire floor sanding equipment | Experienced DIY renovators | Access to stronger machines without buying | Technique still determines the result |
| Hire a professional | Valuable, damaged or large timber floors | Assessment, equipment and experience are combined | Higher upfront labour cost |
DIY may make sense when
DIY sanding can be reasonable if:
- the floor is relatively straightforward;
- you understand sanding equipment;
- you have enough time;
- mistakes can be corrected without putting valuable flooring at risk.
Professional sanding may make more sense when
Consider professional help when:
- boards are badly cupped or uneven;
- the floor has been sanded several times before;
- parquetry is involved;
- deep stains or coating problems are present;
- the project covers a large commercial area;
- the timber is valuable or historically significant;
- you are unsure how much material can safely be removed.
A sanding machine is powerful enough to permanently change a floor in seconds.
Therefore, equipment access should not be confused with experience.
How to Find Floor Sanding Supplies Near Me in Australia
A search for floor sanding supplies near me should focus on the capabilities of the supplier rather than distance alone.
1. Search by supply type
Try combining your suburb or city with the specific item you need.
For example:
- floor sander hire;
- flooring abrasives;
- floor edger hire;
- timber floor coatings;
- dust extractor hire;
- timber floor finishing supplies.
This usually produces more useful results than searching only for a generic hardware store.
2. Ask whether the supplier specialises in flooring
Specialist flooring suppliers may be better positioned to explain compatibility between:
- machines;
- abrasive formats;
- coatings;
- applicators;
- fillers.
However, advice should still be checked against the product manufacturer’s instructions.
3. Confirm abrasive compatibility
Before travelling to collect supplies, check:
- belt dimensions;
- disc diameter;
- hole pattern;
- backing type;
- available grit range.
Two floor sanding machines may require completely different abrasive formats.
4. Ask what comes with hired machinery
A hire package may or may not include:
- dust bags;
- extension leads;
- abrasives;
- edging machine;
- PPE;
- operating accessories.
Therefore, request an itemised list.
5. Check stock before beginning
Nothing slows a sanding project faster than discovering halfway through a room that the required abrasive is unavailable.
Buy or reserve enough material before starting.
10-Step Floor Sanding Supplies Checklist
Use this checklist before collecting equipment.
- Identify the flooring type. Confirm whether the floor is solid timber, engineered timber or another product.
- Inspect its condition. Look for coating wear, cupping, stains, loose boards, exposed nails and previous repairs.
- Check sanding suitability. Determine whether the floor has enough usable timber remaining for another sand.
- Choose the intended finish. Decide on the coating system before finalising abrasive requirements.
- Select the main sanding equipment. Confirm whether you need a belt or drum sander, edger and detail sander.
- Plan the abrasive sequence. Purchase enough compatible belts, discs and sheets for each sanding stage.
- Arrange dust extraction. Confirm machine extraction, hoses, filters and dust bags.
- Prepare PPE. Have suitable respiratory, eye and hearing protection ready before sanding starts.
- Collect repair and cleaning supplies. Include nail-setting tools, suitable repair materials and vacuuming equipment.
- Read every instruction before starting. Review machinery manuals, coating technical sheets and safety information.
Completing these steps before work begins usually prevents unnecessary trips to the supplier.
Common Mistakes When Buying Floor Sanding Supplies Near Me
Buying the cheapest abrasive
Low purchase cost does not necessarily mean low project cost.
An abrasive that loses cutting performance quickly may require more sheets or belts.
Instead, choose the right abrasive for the machine, coating and timber.
Skipping grit stages
Moving directly from very coarse to very fine paper may leave deep scratches behind.
These scratches can become especially obvious after staining.
Progressive refinement normally produces a more consistent surface.
Buying coating before checking compatibility
A finish should be selected as a system.
If you intend to stain the floor, confirm that the stain and topcoat are designed to work together.
Underestimating edges
The main floor can look excellent while edges remain visibly different.
Consequently, allocate enough abrasive discs and time for edging and detail work.
Ignoring dust management
Dust affects safety, cleaning and the coating stage.
Fine contamination left on the floor may also compromise appearance.
Sanding every defect
Some defects need repair rather than more sanding.
For example, additional sanding will not solve an active moisture problem or replace a structurally damaged board.
Australian Hardwood and Floor Sanding Supplies
Australia has many timber floors made from hardwood species.
Common examples may include:
- blackbutt;
- spotted gum;
- jarrah;
- ironbark;
- brush box;
- Tasmanian oak.
Different species can vary considerably in density, grain and appearance.
Consequently, the same abrasive can behave differently on different floors.
Dense hardwood may require more time or abrasive changes than softer timber.
At the same time, aggressive sanding simply because the timber is hard is not automatically correct.
The aim remains controlled material removal.
Old Australian homes
Older Australian houses can present extra challenges.
A timber floor may contain:
- repairs from several decades;
- mixed board species;
- old stains;
- exposed nails;
- previous sanding marks;
- adhesive from former floor coverings.
Therefore, test small areas before committing to a full sanding sequence.
Sometimes the most important supply for an older floor is not another abrasive. It is experienced assessment.
How Much Sandpaper Do I Need?
There is no reliable universal number.
Consumption depends on:
- floor area;
- coating type;
- coating thickness;
- timber species;
- surface condition;
- abrasive quality;
- machine pressure;
- operator technique.
For example, a coating that heavily loads the abrasive may increase consumption dramatically.
Therefore, floor area alone cannot accurately predict quantity.
When hiring equipment, ask whether unused abrasives can be returned. Policies vary between suppliers, so confirm this before purchasing extra material.
Can You Sand Engineered Timber Flooring?
Some engineered floors may be sandable, while others have too little usable wear layer.
This is an important distinction.
A solid timber board normally provides much more material above its tongue than a thin engineered veneer.
Therefore, never assume an engineered floor can be sanded simply because its surface is real timber.
Check:
- product documentation;
- wear-layer thickness;
- previous sanding history;
- manufacturer guidance.
If this information is unavailable, professional assessment is the safer option.
When Floor Sanding Supplies Are Not Enough
There are situations where the project has moved beyond ordinary DIY sanding.
Examples include:
- widespread moisture damage;
- structural movement;
- extensive board replacement;
- extremely thin remaining timber;
- major parquet failure;
- severe cupping;
- unknown historical coatings;
- large commercial flooring areas.
Professional contractors can combine equipment with assessment and technique.
That combination matters because the objective is not merely removing the old surface. It is preserving enough timber while creating a suitable surface for the new coating.
People Also Ask About Floor Sanding Supplies Near Me
Where can I buy floor sanding supplies near me in Australia?
Specialist timber flooring suppliers, selected hardware retailers and equipment-hire businesses commonly stock or hire floor sanding equipment and consumables. Search by the specific product you need, such as flooring abrasives, floor sander hire or timber floor coatings, plus your suburb or city.
What grit sandpaper should I use for timber floor sanding?
The correct starting grit depends on the existing coating and condition of the floor. A restoration may progress through several stages such as coarse, medium and fine sanding, but there is no single sequence that suits every timber floor.
Can I hire a floor sander instead of buying one?
Yes. Equipment-hire businesses commonly provide large floor sanders and edging machines. However, ask what accessories are included and confirm the required abrasive sizes, extraction system and operating instructions before collecting the machine.
Do I need a dust extractor when sanding timber floors?
Effective dust control is important because sanding creates airborne wood dust. Australian workplace guidance recommends controlling wood dust using higher-order controls such as local or on-tool extraction, with suitable PPE used where necessary.
Is DIY floor sanding difficult?
It can be. Machines remove timber quickly, while edging, scratch removal and coating preparation require consistent technique. Straightforward floors may suit experienced DIY renovators, but damaged, valuable or previously sanded floors are often better assessed professionally.
Expert Q&A: Floor Sanding Supplies Near Me
1. How do I know whether my timber floor has enough material left to sand?
Look at areas where the board profile may be visible, such as vents, edges or damaged sections, but do not rely on visual inspection alone if the floor has been sanded repeatedly. A flooring professional can assess the remaining sanding allowance and determine whether full sanding is appropriate.
2. Should I use the same grit on the edger and main floor sander?
The goal is to produce a consistent scratch pattern, but machine type and abrasive action differ. Rather than matching numbers blindly, follow the sanding system recommended for the equipment and ensure that edge scratches are properly blended into the main floor.
3. Should I buy the coating from the same place as the sanding supplies?
It can make planning easier, especially when the supplier understands timber flooring systems. More importantly, ensure primers, stains, sealers and topcoats are compatible and follow the coating manufacturer’s technical instructions.
4. Can I sand a floor immediately after repairing water damage?
Not necessarily. The source of the moisture should be corrected and the timber condition assessed first. Sanding a floor while it is abnormally swollen or cupped can remove excessive timber and may produce an uneven surface after moisture conditions stabilise.
5. How can I tell whether hiring a professional is better value than buying supplies?
Compare the complete cost rather than abrasive prices alone. Include machine hire, edging equipment, dust extraction, abrasives, PPE, repair products, coatings, applicators, transport and your time. Then consider the cost and feasibility of correcting an over-sanded or poorly finished floor.
Final Advice Before Searching for Floor Sanding Supplies Near Me
The best result rarely comes from simply buying the most powerful sander and the coarsest abrasive available.
Start with the floor.
Identify the timber, inspect the condition and determine whether moisture, repairs or previous sanding history need attention. Then decide on the coating system and work backwards to the necessary preparation.
Next, choose equipment with effective dust extraction and obtain compatible abrasives in a sensible grit progression.
Finally, plan the finishing stage before the floor is bare.
That sequence reduces guesswork.
It also explains why experienced floor sanders spend time inspecting and preparing floors before aggressive sanding begins.
For Australian homeowners, the Australian Timber Flooring Association guidance reinforces this approach by recommending assessment, preparation, dust minimisation and suitable sanding before coating.
Meanwhile, Australian safety guidance makes it clear that airborne wood dust should be taken seriously and controlled rather than regarded as an unavoidable inconvenience.
Ultimately, a search for floor sanding supplies near me should help you build a complete restoration system, not simply a shopping basket.
If your timber floor is heavily worn, uneven, previously sanded or valuable enough that mistakes would be costly, professional assessment may be the better starting point. You can explore professional timber floor sanding, polishing and restoration services from Enviro Floors to discuss the condition of your floor and determine whether full sanding, recoating, repairs or another restoration approach is appropriate.