post
Floor Sanding in Australia: The Complete Practical Guide
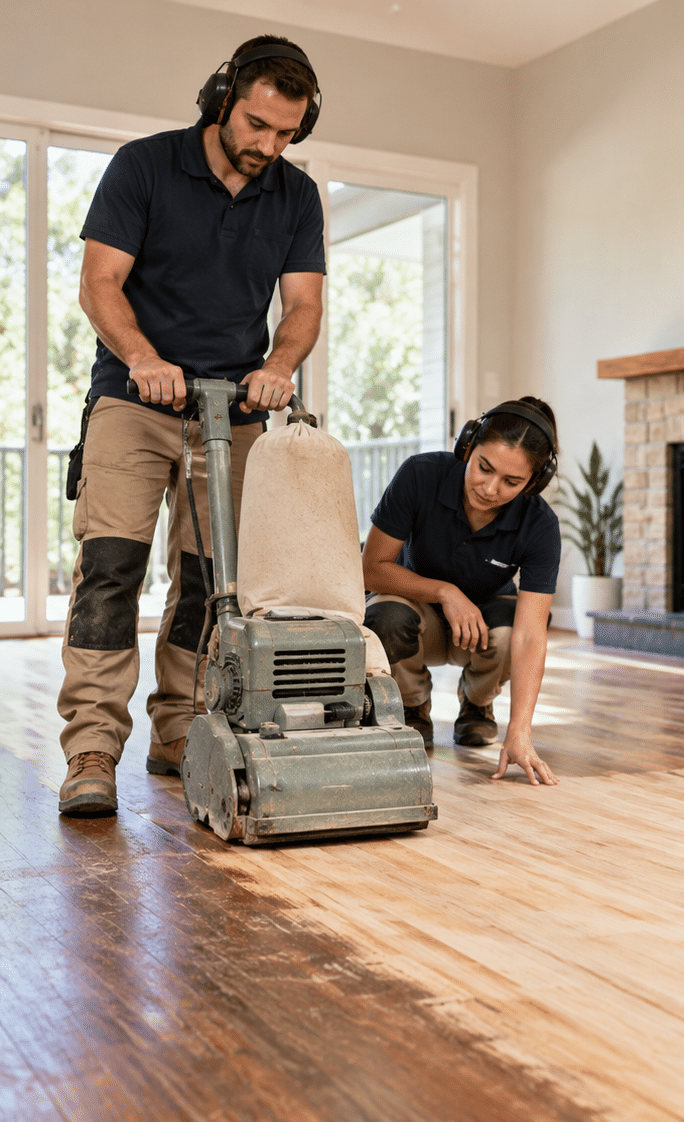
Timber floors can gradually lose their original character through foot traffic, scratches, old coatings and years of everyday use. Floor sanding is one of the main methods used to remove worn surface layers, smooth timber and prepare a floor for a new protective finish. However, successful sanding involves much more than running a machine over the boards.
The timber species, existing coating, board condition, previous sanding, moisture, room layout and finishing system can all affect the result. In Australia, the approach can also vary between older Queenslander homes, Victorian-era houses, contemporary apartments and newer suburban properties.
From my experience, the best floor-sanding projects begin with assessment rather than machinery. Before sanding starts, you need to know what the existing floor is made from, how much timber remains above the tongue and groove, whether boards are stable and which finish is appropriate for the room.
Floor sanding is the process of mechanically removing worn coatings and a controlled amount of timber from a timber floor to smooth and level its surface. The prepared floor can then receive a suitable protective coating, such as a water-based or solvent-based finish.
Table of Contents
- What Is Floor Sanding?
- Why Floor Sanding Matters
- How Floor Sanding Works
- Floor Sanding: What Happens During the Process?
- How Much Timber Is Removed During Floor Sanding?
- Choosing the Right Floor Sanding Method
- Dust Control During Floor Sanding
- Floor Sanding and Australian Timber Species
- Floor Sanding Older Australian Homes
- Floor Sanding vs Replacing Timber Floors
- Choosing a Floor Finish After Sanding
- Water-Based vs Solvent-Based Floor Finishes
- How Long Does Floor Sanding Take?
- Preparing Your Australian Home for Floor Sanding
- Floor Sanding Installation Checklist
- What Affects the Cost of Floor Sanding?
- Common Floor Sanding Problems
- Caring for a Newly Sanded Timber Floor
- People Also Ask
- Q&A: Expert Questions About Floor Sanding
- Conclusion
What Is Floor Sanding?
Floor sanding uses abrasive machinery to remove surface imperfections and, where necessary, old coatings from timber flooring.
The process is normally performed using progressively finer abrasives.
A coarse abrasive may initially remove an old coating or significant surface damage. Finer abrasives then refine the timber surface before the final finish is applied.
The exact sanding sequence depends on the floor.
For example, a floor with several layers of old coating may require more aggressive initial sanding than a relatively clean floor that only needs surface preparation.
Similarly, boards with significant cupping or unevenness may require different treatment from boards that are already relatively flat.
What does sanding actually remove?
Depending on the condition of the floor, sanding can remove:
- Old polyurethane
- Varnish
- Surface stains
- Minor scratches
- Small surface imperfections
- Dirt embedded in old finishes
- Slight unevenness
- Previous coating residues
However, sanding is not a way to correct every structural problem.
Loose boards, significant movement, moisture problems, severe cupping or damaged boards need to be assessed separately.
That distinction is important.
Sanding is a surface-restoration process. It is not a substitute for repairing a structurally defective floor.
Why Floor Sanding Matters
Timber is a natural material.
Even when a floor is well maintained, it can develop marks over time.
High-traffic areas often show wear first. Hallways, kitchen approaches, living areas and doorways may develop different levels of wear from bedrooms or less-used rooms.
A worn finish can also make the timber appear dull even when the boards themselves remain in reasonable condition.
Sanding can prepare the floor for a new finish
One major purpose of sanding is to create a suitable surface for the next coating.
A new finish needs a properly prepared substrate.
If old coatings, contaminants or uneven areas remain, they can affect the appearance and performance of the new coating.
Therefore, sanding and finishing should be considered as one system.
Sanding can change the appearance
Freshly prepared timber can look significantly different from an aged floor.
The process can reveal more of the timber’s natural colour and grain.
However, the final appearance depends on:
- Timber species
- Existing timber colour
- Previous coatings
- Sanding quality
- Stain, if used
- Finish type
- Number of coats
- Lighting
Consequently, it is difficult to judge the final appearance from sanding alone.
How Floor Sanding Works
A professional floor-sanding project generally involves several stages.
1. Inspection
The floor is assessed before machinery is used.
The contractor may look for:
- Loose boards
- Nails
- Screws
- Cracks
- Gaps
- Cupping
- Crowning
- Previous repairs
- Water damage
- Previous sanding
- Uneven areas
- Damaged sections
This assessment helps determine how aggressively the floor can be sanded.
2. Preparation
Furniture is removed and the working area is prepared.
Protruding nails or other fasteners may need to be addressed so that they do not damage sanding equipment or create additional problems.
Skirting boards, doorways and adjoining surfaces may also need protection.
3. Coarse sanding
The first sanding stage generally removes the existing finish and levels the surface as required.
The objective is not simply to make the floor look scratched.
The abrasive needs to remove the unwanted surface while avoiding unnecessary removal of sound timber.
4. Intermediate sanding
Once the major imperfections and old coating have been removed, a finer abrasive is used.
This reduces the marks left by the earlier sanding stage.
5. Fine sanding
Further refinement prepares the surface for finishing.
The final sanding sequence depends on the timber, coating system and equipment being used.
6. Edge sanding
Large sanding machines cannot reach every area.
An edging machine is therefore commonly used around walls and other perimeter sections.
This stage requires care because the edge machine can remove timber quickly if handled incorrectly.
7. Detail sanding
Corners and difficult areas may require hand sanding or smaller equipment.
8. Cleaning
Dust must be removed before finishing.
This is a critical stage.
Even a beautifully sanded floor can look poor if dust or contamination remains when the coating is applied.
9. Coating
Once the floor is prepared and clean, the selected finish is applied according to the manufacturer’s requirements.
10. Curing
The coating needs time to dry and/or cure.
The room may need to remain unused for a specified period.
The exact timing depends on the product, temperature, ventilation, humidity and application conditions.
Floor Sanding: What Happens During the Process?
Homeowners often imagine sanding as one simple operation.
In reality, it is a sequence of controlled processes.
The first passes are about removal and flattening.
Later passes are about refinement.
This is similar to preparing a surface before painting. A rough base cannot simply be covered with more finish and expected to become perfectly smooth.
Why sanding marks matter
Each abrasive creates a particular scratch pattern.
If a coarse abrasive is used and the marks are not progressively removed, they may remain visible after finishing.
This is particularly noticeable under strong natural light or when the final coating has a reflective appearance.
Therefore, the transition between abrasive grades matters.
Direction matters too
The direction of sanding depends on the equipment and floor construction.
A professional needs to account for board orientation and the desired finish.
Poor technique can create visible patterns or unevenness.
How Much Timber Is Removed During Floor Sanding?
There is no universal amount.
The quantity of timber removed depends on:
- Floor condition
- Existing coating thickness
- Board flatness
- Previous sanding
- Timber species
- Board thickness
- Damage
- Desired finish
- Sanding equipment
- Operator technique
This is why repeated sanding over many decades can eventually become a concern.
Traditional solid timber boards can often be sanded more than once, but the available material is not unlimited.
Tongue-and-groove flooring
Many timber floors use tongue-and-groove boards.
The tongue connects one board to the next and contributes to the floor’s construction.
If too much material is removed from the surface, the geometry of the board can eventually become a problem.
Therefore, a professional should assess older or heavily sanded floors before deciding how much material can safely be removed.
Choosing the Right Floor Sanding Method
Different floors require different approaches.
Standard solid timber flooring
Solid timber boards can often be sanded and refinished when they have sufficient remaining thickness and are structurally suitable.
The sanding process can remove surface wear and prepare the timber for a new coating.
Parquetry
Parquetry consists of smaller timber pieces arranged in patterns.
The sanding technique needs to account for the direction and arrangement of those pieces.
Aggressive or inappropriate sanding can damage edges and alter the appearance of the pattern.
Engineered timber
Engineered timber flooring has a real timber wear layer over a constructed core.
This creates an important distinction.
Not all engineered floors can be sanded repeatedly.
The thickness of the real timber layer and the manufacturer’s specifications are critical.
Before sanding engineered flooring, identify the product and confirm its refurbishment limitations.
Previously stained floors
A stain may have penetrated into the timber.
If the goal is to change the colour significantly, more sanding may be required than for a simple clear-coat refurbishment.
However, excessive sanding should not be used simply to chase a particular colour result.
Dust Control During Floor Sanding
Dust control deserves serious attention.
Sanding timber generates wood dust, and professional contractors should use suitable controls to minimise exposure.
Safe Work Australia identifies wood dust as a potential occupational health hazard and specifically notes that sanding some types of wood can generate dust exposure. (Safe Work Australia)
The national guidance also recommends controls such as effective ventilation, on-tool extraction and appropriate respiratory protective equipment where required.
This is one reason modern professional sanding equipment often incorporates dust extraction.
Is floor sanding completely dust-free?
Be cautious with claims of “100% dust-free” sanding.
Mechanical sanding inevitably involves abrasion.
Good equipment and extraction can greatly reduce airborne and settled dust, but homeowners should not assume that no dust whatsoever will be generated.
The quality of containment, extraction, equipment maintenance and site preparation all matter.
Why dust control matters in an occupied home
Fine dust can travel beyond the immediate work area.
It may settle on:
- Shelves
- Windowsills
- Furniture
- Kitchen surfaces
- Air-conditioning components
- Electronics
- Fabrics
Therefore, discuss dust-control arrangements with the contractor before work begins.
If occupants remain in the property, the contractor should also consider how people will be separated from the work area.
Workplace requirements
For commercial or worksite environments, Australian workplace health and safety requirements apply.
Safe Work Australia’s current guidance explains that workplace exposure standards for airborne contaminants remain applicable through 30 November 2026, with a transition to the new workplace exposure limits from 1 December 2026. (Safe Work Australia)
This is administrative and workplace-safety information, not legal advice. Businesses should confirm requirements with their relevant state or territory regulator.
Floor Sanding and Australian Timber Species
Australia has a wide range of timber species used in flooring.
Examples include:
- Blackbutt
- Spotted gum
- Jarrah
- Tasmanian oak
- Victorian ash
- Brush box
- Sydney blue gum
- Cypress
- Various imported hardwoods
Each timber can respond differently to sanding and finishing.
Blackbutt
Blackbutt is commonly used in Australian flooring and can produce a warm, natural appearance.
Its grain and colour variation mean that the final appearance can differ between boards.
Spotted gum
Spotted gum can have distinctive grain patterns and colour variation.
A clear finish can emphasise these characteristics.
Jarrah
Jarrah has a naturally rich reddish-brown appearance.
Finishing choices can influence how strong or subdued that colour appears.
Tasmanian oak
Tasmanian oak is a collective commercial term used for several closely related eucalypt species.
It can produce a relatively light appearance that works well with contemporary interiors.
Why species matters
A sanding contractor should identify the timber where possible.
That helps inform:
- Sanding approach
- Abrasive selection
- Expected colour
- Finish selection
- Repair strategy
If you’re uncertain about the timber species, ask for an assessment before choosing a stain or finish.
Floor Sanding Older Australian Homes
Older Australian homes can present unique challenges.
Period properties may have floors that have already been sanded multiple times.
They may also contain:
- Old nails
- Repairs
- Board replacements
- Uneven subfloors
- Different timber species
- Historical coatings
- Gaps
- Boards with varying thicknesses
Don’t expect an old floor to become a new floor
One of the most important expectations to establish is that sanding restores a timber floor; it does not necessarily erase its history.
Old boards may retain:
- Nail holes
- Natural knots
- Colour variation
- Previous repairs
- Minor gaps
- Character marks
Many homeowners consider these features part of the appeal.
Heritage considerations
If the property is heritage-listed or located within a heritage-controlled area, renovation requirements can vary.
Before undertaking work that could affect protected elements, check the relevant state, territory or local authority requirements.
This is an administrative consideration rather than legal advice.
Floor Sanding vs Replacing Timber Floors
If your timber floor looks tired, you may be wondering whether to sand it or replace it.
A useful starting point is the condition of the existing boards.
| Consideration | Sand and refinish | Replace flooring |
| Existing boards | Must be suitable for refurbishment | Condition is less relevant |
| Structural problems | Usually require repair first | New construction can address some problems |
| Surface wear | Often suitable for sanding | Replacement may be unnecessary |
| Historical character | Can preserve existing timber | Existing character may be lost |
| Design change | Finish and colour can change | New species/design options available |
| Waste | Usually less material is removed | More existing material may be discarded |
| Time | Depends on floor condition and finish | Can involve removal and installation |
| Cost | Varies with repairs and floor area | Often includes new material plus installation |
| Outcome | Retains existing boards | Creates a new floor surface |
These are general comparisons, not guarantees.
The condition of the individual floor should determine the approach.
Choosing a Floor Finish After Sanding
Sanding prepares the timber.
The finish determines much of the final appearance and surface performance.
Common finish categories include:
- Water-based polyurethane
- Solvent-based polyurethane
- Hardwax oil
- Penetrating oils
- Other manufacturer-specific coating systems
Water-based finishes
Water-based coatings are widely used in modern timber-floor finishing.
They can offer a relatively clear appearance and may have different drying characteristics from solvent-based systems.
The exact performance depends on the product.
Solvent-based finishes
Solvent-based products can produce a different appearance and application experience.
Some homeowners prefer the warmer visual character associated with certain traditional coating systems.
However, drying, ventilation and re-entry requirements need to be considered.
Oils and hardwax oils
Oil-based systems can provide a different tactile and visual appearance.
They also have different maintenance requirements from film-forming polyurethane systems.
The choice should therefore be made based on how the floor will be used rather than simply which finish looks attractive in a sample.
Water-Based vs Solvent-Based Floor Finishes
A basic comparison can help.
| Factor | Water-based coating | Solvent-based coating |
| Appearance | Often relatively clear | Can provide warmer visual character depending on product |
| Odour | Typically lower during application | Typically stronger during application |
| Drying | Product dependent; often relatively quick | Product dependent |
| Ventilation | Still important | Particularly important |
| Colour change | Often designed to minimise yellowing | Some products can add warmth over time |
| Maintenance | Depends on product | Depends on product |
| Final durability | Product dependent | Product dependent |
Do not choose solely on the words “water-based” or “solvent-based”.
Instead, compare the manufacturer’s technical data sheet, application requirements, curing time and maintenance instructions.
How Long Does Floor Sanding Take?
There is no single timeframe that applies to every home.
The duration can depend on:
- Floor area
- Number of rooms
- Furniture removal
- Floor condition
- Existing coating
- Repairs
- Sanding stages
- Edging
- Coating system
- Number of coats
- Drying conditions
- Curing requirements
A relatively straightforward floor may progress quickly, while an older floor with extensive repairs can take substantially longer.
Drying is not the same as curing
This distinction is important.
A coating may feel dry to the touch before it has reached its full cure.
Therefore, homeowners should follow the coating manufacturer’s instructions about:
- Walking on the floor
- Replacing furniture
- Using rugs
- Cleaning
- Heavy traffic
- Placing protective pads under furniture
Don’t assume that a floor is ready for normal use simply because the surface no longer feels wet.
Preparing Your Australian Home for Floor Sanding
Good preparation can make the project smoother.
Before the contractor arrives
Remove furniture and personal items from the work area.
If furniture cannot be removed, discuss options with the contractor before work begins.
Remove curtains and delicate items where appropriate
Dust and vibration can affect delicate furnishings.
Protect adjoining areas
Discuss how doorways, cupboards, stone surfaces and other flooring will be protected.
Consider air-conditioning
Dust and fumes can interact with HVAC systems.
Ask the contractor whether particular systems should be turned off or isolated during different stages.
Plan household access
If the hallway is being sanded, you may temporarily lose access between rooms.
If the only bathroom is across the work area, this needs to be considered before work starts.
Floor Sanding Installation Checklist
Use this checklist before approving the project:
- Identify the timber species.
- Check whether the floor has been sanded previously.
- Inspect for loose or damaged boards.
- Look for signs of moisture problems.
- Discuss existing coatings.
- Confirm the proposed sanding sequence.
- Ask how dust will be controlled.
- Discuss furniture removal.
- Confirm the proposed finish.
- Ask for the manufacturer’s technical information.
- Clarify drying and curing times.
- Confirm when normal foot traffic can resume.
- Ask when furniture can be returned.
- Discuss rug placement.
- Confirm the cleaning and maintenance process.
- Record the product names and batch information where available.
- Ask how future maintenance should be handled.
This checklist does not replace professional assessment, but it gives homeowners a practical framework for comparing proposals.
What Affects the Cost of Floor Sanding?
Floor sanding prices vary significantly between projects.
Be cautious about treating an advertised price per square metre as a final quotation.
The actual project cost may be affected by:
Floor area
Larger areas can change the overall project cost and may influence the contractor’s setup and equipment requirements.
Floor condition
A heavily worn floor requiring repairs and multiple preparation stages can cost more than a straightforward refurbishment.
Existing coating
Old coatings can be difficult to remove.
Multiple layers or incompatible materials can increase preparation time.
Access
Stairs, narrow corridors and difficult room layouts can affect labour and equipment movement.
Repairs
Replacing boards, securing loose sections or addressing other defects can be additional work.
Finish
Different coating systems have different material and labour requirements.
Furniture
Furniture removal and replacement may be included or excluded.
Always check the scope.
A better way to compare quotes
Ask for an itemised quotation that identifies:
- Preparation
- Sanding
- Repairs
- Edging
- Coating
- Number of coats
- Materials
- Furniture handling
- Cleaning
- GST
- Additional work
This makes competing quotations easier to compare.
Common Floor Sanding Problems
Sanding too aggressively
Removing more timber than necessary can reduce the remaining service life of the floor.
Professional assessment is especially important for older boards.
Visible sanding marks
These can occur when abrasive stages are not properly transitioned.
Strong light can make them easier to see.
Uneven edges
Poor edging technique can create visible differences between the main floor and perimeter.
Swirl marks
Incorrect use of certain sanding equipment can create patterns in the timber.
Poor coating adhesion
Contamination or inadequate preparation can affect the finish.
Dust contamination
Dust settling during coating can affect the final surface.
Uneven colour
Timber is naturally variable.
However, uneven sanding or inconsistent preparation can make colour differences more obvious.
Ignoring moisture
A floor with an unresolved moisture problem may not be suitable for immediate sanding and coating.
Moisture should be investigated before cosmetic restoration proceeds.
What If Timber Floors Have Gaps?
Gaps between boards are common in some older timber floors.
They can occur as timber responds to changing environmental conditions.
Whether gaps should be filled depends on:
- Gap size
- Floor movement
- Seasonal conditions
- Timber type
- Existing construction
- Desired appearance
Filling every gap is not automatically the correct solution.
A professional should assess whether the proposed filler system is compatible with the floor and how it is expected to behave as the timber moves.
What If the Floor Is Cupped?
Cupping occurs when boards curve across their width, creating a concave or convex surface.
The cause may involve moisture imbalance or other conditions.
Sanding can sometimes reduce minor unevenness, but aggressive sanding should not be used to hide an unresolved moisture problem.
The cause should be investigated first.
This is another example of why floor sanding is not simply a cosmetic exercise.
Caring for a Newly Sanded Timber Floor
Once your floor has been refinished, the maintenance routine matters.
Follow the coating manufacturer’s instructions
Different finishes have different requirements.
Use suitable cleaning products
Avoid assuming that a generic floor cleaner is compatible with every coating.
Use soft cleaning tools
Aggressive brushes and abrasive products can damage some finishes.
Wipe spills promptly
Timber floors should not be treated as waterproof surfaces.
Use furniture protection
Felt pads can help reduce scratching from furniture movement.
Check them regularly because trapped grit can cause abrasion.
Be careful with rugs
Some coatings require a curing period before rugs can be placed.
Follow the coating manufacturer’s instructions.
Avoid dragging furniture
Lift rather than drag heavy furniture where practical.
Manage direct sunlight
Strong sunlight can affect timber colour over time.
Curtains, blinds and other window treatments can help moderate exposure.
How Often Should Timber Floors Be Sanded?
There is no universal schedule.
Floor sanding should generally be based on the floor’s condition rather than a fixed calendar.
If the protective coating is worn but the timber remains sound, a maintenance recoat may sometimes be appropriate instead of a full sanding.
Conversely, a badly worn floor may require more substantial preparation.
The key principle is to avoid unnecessary sanding.
Every full sanding removes some timber.
Therefore, sensible maintenance can help extend the useful life of the floor.
Is DIY Floor Sanding a Good Idea?
DIY sanding is possible, but it has a learning curve.
Large sanding machines can remove timber quickly.
A beginner may accidentally create:
- Deep sanding marks
- Dips
- Uneven edges
- Visible machine lines
- Excessive timber removal
The finish application also requires careful preparation.
For a small repair or light maintenance task, DIY may be appropriate for an experienced homeowner. However, whole-floor restoration is a different proposition.
Consider the value of the existing floor before deciding.
A mistake on a new floating surface may be inconvenient.
A mistake on a century-old hardwood floor can be much harder to correct.
Floor Sanding and Indoor Air Quality
Dust and coating fumes are separate considerations.
Sanding generates wood dust.
Finishing products can introduce vapours during application and drying.
Therefore, ventilation and exposure control should be planned for both stages.
Safe Work Australia’s occupational-lung-disease guidance identifies wood dust among workplace airborne hazards and recommends identifying and managing exposure risks.
For professional contractors, appropriate dust extraction and respiratory protection are part of responsible work practices.
For homeowners, the practical message is straightforward: keep occupants away from active sanding and follow the coating manufacturer’s instructions regarding ventilation and re-entry.
Choosing a Floor Sanding Contractor in Australia
Price is only one factor.
Before engaging a contractor, ask:
- How long have they been sanding timber floors?
- What timber species do they regularly work with?
- What sanding equipment do they use?
- What dust-extraction system is used?
- Which coatings do they recommend?
- Can they explain why that coating suits your floor?
- How will damaged boards be handled?
- How will edges be protected?
- What preparation is included?
- What is excluded?
- What are the expected drying and curing periods?
- How should the finished floor be maintained?
A good contractor should be able to explain the process in language you understand.
Questions to Ask Before Getting a Quote
A useful quote should answer more than “How much per square metre?”
Ask for:
What is included?
This avoids misunderstandings about repairs, coatings and cleaning.
What finish will be used?
Ask for the exact product name.
How many coats are included?
The appropriate number depends on the coating system and manufacturer’s instructions.
How much sanding is expected?
A professional should be able to explain the planned approach after inspecting the floor.
What happens if damaged boards are found?
Agree on how additional work will be handled.
How long before furniture can return?
Make sure this is based on the actual coating system.
What maintenance is recommended?
Obtain the manufacturer’s care information where possible.
People Also Ask
How much does floor sanding cost in Australia?
There is no single national price because project costs depend on floor area, timber condition, coating removal, repairs, access, finish selection and labour. The most useful comparison is an itemised quotation showing exactly what is included rather than a headline square-metre rate.
Is floor sanding very dusty?
Sanding generates wood dust, but professional extraction equipment and good site controls can substantially reduce airborne and settled dust. Safe Work Australia identifies wood dust as an occupational hazard and recommends controls such as extraction, ventilation and appropriate respiratory protection where required.
How long after floor sanding can I walk on the floor?
The answer depends on the coating system. Some products dry relatively quickly, but drying does not necessarily mean the coating has fully cured, so the manufacturer’s instructions should determine when light traffic, furniture and rugs can return.
Can all timber floors be sanded?
No. The suitability depends on the floor construction, remaining timber thickness, previous sanding, damage and product specifications. Engineered timber in particular needs to be assessed according to the thickness of its real timber wear layer.
Does floor sanding remove scratches?
It can remove many surface scratches and marks when they are within the timber or existing coating layer that can safely be removed. Deep damage may require board repair or replacement rather than simply more aggressive sanding.
Q&A: Expert Questions About Floor Sanding
1. Should I sand before or after replacing damaged boards?
Damaged boards should generally be identified before the main sanding process.
Replacement boards can then be installed and brought into the floor before final sanding and finishing.
This allows the repaired section to be incorporated into the overall surface rather than trying to match a newly installed board to an already finished floor.
2. Can floor sanding remove dark stains from timber?
Sometimes, but not always.
Surface staining may disappear during sanding if it has not penetrated deeply.
However, deep water stains, pet-related staining, chemical marks or long-term discolouration can penetrate further into the timber.
Removing very deep staining may require substantial material removal, which may not be appropriate.
A contractor should assess the depth of the stain before promising a particular result.
3. Can I change the colour of my timber floor during sanding?
Sanding removes or reduces the existing finish and creates an opportunity to change the appearance.
A compatible stain or tinted finish may be used where appropriate.
However, timber species respond differently to colour products.
Always test the proposed colour on representative timber before applying it to the entire floor.
4. Should floor sanding be done before painting walls?
In many renovation projects, completing messy preparation work before final painting can reduce the risk of damaging newly painted surfaces.
However, the best sequence depends on the entire renovation.
Discuss the order with your builder, painter and flooring contractor.
The key objective is to avoid having later trades damage the newly finished floor.
5. Can sanding fix squeaky timber floors?
Sanding itself does not normally correct the underlying cause of squeaking.
Squeaks can be related to movement between boards, fasteners, joists or subfloor components.
If the floor squeaks, identify and address the underlying issue where practical before treating the surface.
6. Is sanding suitable for a floor with moisture damage?
Not until the moisture issue has been investigated and addressed.
Timber responds to moisture.
Sanding a floor while an active moisture problem remains can result in an unsatisfactory restoration and potentially repeat damage.
The source may involve plumbing, ventilation, subfloor moisture or other building conditions.
7. Can floor sanding make an old timber floor look completely new?
It can substantially refresh a sound timber floor, but “completely new” is not a realistic description for every older floor.
Natural variation, knots, nail holes, repairs, colour differences and previous wear may remain.
In many Australian homes, these characteristics are part of the floor’s character.
A good restoration should aim for a clean, consistent and appropriately finished result rather than pretending the timber has never been used.
A Practical Floor Sanding Decision Guide
If you are considering sanding your timber floor, work through these questions:
Is the floor structurally sound?
If boards are loose, badly damaged or affected by moisture, address those issues first.
Has it been sanded before?
If you know the floor has been refurbished several times, obtain professional advice before removing another significant layer.
What result do you want?
Do you want:
- Natural timber?
- A darker colour?
- A lighter appearance?
- A low-sheen finish?
- A more traditional appearance?
- A contemporary look?
Your desired outcome influences the finishing system.
How will the room be used?
A rarely used formal room has different demands from a kitchen, hallway or family living area.
Can the household vacate the area?
Sanding and finishing are easier to manage when occupants can stay away from the work area.
What maintenance are you prepared to do?
Some finishes may require more specific care than others.
Choose a system that suits your lifestyle.
Why Professional Assessment Matters
Timber flooring is not a generic building material.
Species, age, thickness, construction and previous treatment all matter.
A professional assessment can identify issues that are not obvious from photographs.
For example, a floor may look suitable for sanding while actually having:
- Very thin remaining boards
- Previous aggressive sanding
- Hidden moisture damage
- Loose sections
- Significant cupping
- Multiple repairs
Identifying these issues before work starts is generally preferable to discovering them after the first sanding pass.
Australian Climate and Timber Floors
Australian homes experience a wide range of climatic conditions.
A timber floor in tropical Queensland operates in a different environment from one in Tasmania or inland South Australia.
Humidity and temperature can affect timber movement.
This does not mean timber flooring is unsuitable for any particular Australian climate.
It means installation, moisture management, acclimatisation requirements where applicable, ventilation and maintenance need to be considered according to the product and location.
For homeowners, the practical lesson is simple: ask the flooring professional how local environmental conditions affect your specific floor.
Conclusion
Floor sanding is more than a cosmetic treatment. It is a controlled process that removes worn coatings and, where appropriate, a limited amount of timber to create a smooth, suitable surface for refinishing.
For Australian homes, the right approach depends on the existing timber, floor construction, previous sanding, moisture conditions, damage, desired appearance and chosen coating.
The most important steps are assessment, careful sanding, effective dust management, suitable finishing and proper curing. Safe Work Australia recognises wood dust as an occupational hazard, reinforcing why professional dust controls should be taken seriously during sanding work. (Safe Work Australia)
Before choosing a contractor, ask for a clear scope of work. Find out what sanding is proposed, which coating will be used, how dust will be controlled, what repairs are included and when the floor can safely return to normal use.
Most importantly, do not judge a floor-sanding project purely by price. The existing timber is the foundation of the result, and careful preparation can be just as important as the final coating.
If you’re planning to restore timber flooring and want to discuss the condition, preparation and finishing options for your Australian home, explore professional timber floor restoration and floor sanding services from Enviro Floors.
Costs, product availability, coating specifications and project timeframes vary by floor and location. Estimates should be confirmed through an inspection and written quotation. Australian workplace-safety references are provided as general administrative information, not legal advice; businesses should confirm applicable requirements with their relevant state or territory regulator.